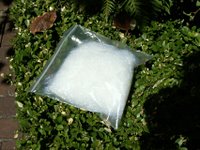
Some of you will instantly spot the mistakes in the yarn I made (pictured above). I created a terrible mess of the singles when I tried to ply them. I will explain.
The singles were spun when I was still getting to know the workings of a wheel. Which was after watching an excellent video by Patsy Z, the Hand Spinnin' Guru, and before John's class. Lots of inconsistencies. So I decided to carefully ply them as to try to make a balanced yarn. But I made a big mistake. Huge! I had more singles on one bobbin than another. SO, trying not to waste yarn, I decided to make a center-pull ball with the bigger bobbin of singles. The idea was that after the smaller bobbin ran out, I could just pull out the other end of the ball of singles and continue to ply with it. I think it was a good idea. The thing was that I just put the ball of singles in a bowl and started plying. Without some extra weight to create more tension, that ball of singles started to get all twisted and tangled. Bad bad bad. So, when the ball got smaller the mess got bigger. Not only did I get a tangled mess, I also didn't have the tension to ply correctly. Grrrr! In the end I had to break the yarn after the smaller bobbin was done. I just ran out of patience to fuss with the problem. So, I got a little less than 4 oz in the skein that I made. I'll use the rest of the singles in some kind of leftover yarn project. I don't even want to look at it at the moment. LOL The fiber is Ashland Bay's Merino top.
Another lesson learned.
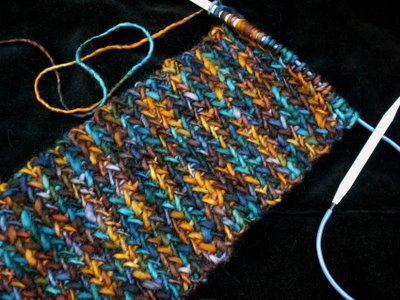
I was able to get some knitting done on "My So Called Scarf". I took it to the spinning guild meeting and realized that I wasn't very good at stitching and bitching at the same time. LOL The scarf is 30 stitches wide. At one point during the meeting I noticed something wasn't looking quite right. I didn't think much of it and continued. I thought it was just the way the yarn looked. You know, thick and thin. Then I stopped and counted the stitches. 12!!! What??? How did that happen? I took one look at the scarf and just couldn't believe myself. How did I let it get that way? LOL I think I forgot to knit one extra stitch before doing a psso. The stitch count dropped super fast like that. Fortunately it was possible to rip back and correct the mistakes.
I am loving the colors in the scarf.
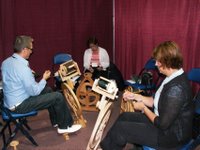
Monday, August 28, 2006
Wednesday, August 23, 2006
Violets Revised
When I was knitting the sample for Violets by the River I noticed that the right and left sides of the triangle did not look the same. I wasn't satisfied with the look. I thought maybe blocking would take care of it, but I talked to Ted just in case. Turned out that he wasn't pleased with the original design either. So he shared with me the modification he made when he knitted his "Violets".
Following the original instructions, when knitting the violets you increase 2 stitches on the purl rows (even number rows). This will create an unbalanced look (in my opinion). To solve the problem, do a YO at the beginning of each row instead (except the last row of the pattern.) This will give you 2 increases every 2 rows, just like the original pattern.
The cast-on and the first 2 rows are also modified to incorporate the YOs. Cast on 3 stitches using long-tail cast-on. Do not tighten the strand coming off the thumb too much. Keep it loose. (Check out Ted's post on loose cast-on.) Then follow these steps:
Row 1: YO, k 3. (4 stitches on needle)
Row 2: YO, p 4. (5 stitches on needle)
Row 3: YO, k 2, O, SSK, k1. (6 stitches on needle. This is actually the same as what's charted for Row 3 in the pattern, except that there's YO at the beginning.)
Row 4: YO, p to end.
Row 5: YO, k1, k2tog, O, k1, O, SSK, k1.
Row 6: YO, p to end.
So, basically you work the odd number rows as instructed in the pattern except adding a YO in the beginning of the row. The even number rows your work a YO in the beginning then just purl to the end, ignoring the k f&B increases. You might want to hold the YOs in place with your fingers when you work the next stitch so that it won't twist out of place. Do the YOs normally. Meaning yarn in back on the knit rows, yarn in front on the purl rows. Don't do the YO on the last row of the pattern (which is an odd number row), or you will have one extra YO on the right of the triangle.
A, B and C in the above picture are the 3 cast-on stitches. A being the first one. Put markers on these and it will be much easier to pick up and knit later. D is the first YO on row 1.
Now, after you finish knitting the violets, you will begin knitting up along left and right sides of the triangle for the River, starting on the left. Put a spare needle through the YOs on the left like this:
Once you are ready, pick-up and knit like this: (knit, purl into 1 YO; knit, purl into next YO; knit into 3rd YO); repeat this along the edge. There should be 121 stitches when you reach the cast-on stitch marked A . Work "k1, O k1" into the stitch marked B. Beginning with the cast-on stitch marked C you pick-up and knit like before. If for some reason that you find you have too many stitches picked up, skip some the purl stitches in the process.
Now, there's one more thing. Ted turned me on to adding one extra stitch on each side so that the violets are not so near the edges. If you compare the two samples above, you will notice that the pink violets are not as close to the edge as the green one. If you like that, you will have to add a couple of rows before you start the pattern. Meaning, you will start knitting the violets at row 5 instead of row 3. This is what you do:
Cast on 3 stitches.
Row 1: YO, k 3. (4 stitches on needle)
Row 2: YO, p 4. (5 stitches on needle)
Row 3: YO, k 5. (6 stitches on needle)
Row 4: YO, p 6. (7 stitches on needle)
Row 5: YO, k3, O, SSK, k2.
Row 6: YO, p to end.
As stated, the pattern begins on row 5. Follow the pattern. Just remember that you are adding one extra stitch at the beginning after the YO, and one at the end.
Now, there will be 2 extra rows when you are ready to pick-up for the River. So, take out a couple of the purl stitches. Also, there will be 2 extra stitches across the top when you are ready for the honeybees. You can ignore the increases on one row to remedy that.
OK, I think that's it. Let me know if there's any questions. I'll try my best to answer them.
Ted, please let me know if you see anything wrong. Oh, Ted, thanks for all the instructions and the sample photos. :-)
Tuesday, August 22, 2006
Andean Plying
Enjoy Andean plying but worry about cutting off circulation of your hand? Here's a trick:
Andean Plying Bracelet, Simplified
Thanks Rosemary!
On another subject. The post on how Ted modified "Violets of the River" is long overdue. I will organize the info as best as I can and post it either later today or tomorrow.
Andean Plying Bracelet, Simplified
Thanks Rosemary!
On another subject. The post on how Ted modified "Violets of the River" is long overdue. I will organize the info as best as I can and post it either later today or tomorrow.
Monday, August 21, 2006
Cards Anyone?
Yep! I want a pair of hand cards. Never, NEVER in my wildest dreams did I ever think that I would want to get into fiber preparation. The thing is, with a wonderful teacher, some fleece that came with a cute baby picture of a sheep name "Susie", ample time to practice over and over, some dyed fleece to try some fiber blending fun, you get hooked! I want some hand cards! If not for the other things that I purchased, I would've gotten a pair. *sigh* What's next?
Last weekend was the "Fabulous Fiber Fest" show. I spent 6 hours on Friday in the "Spinning Wheel A-Z" class, taught by the very wonderful and very thorough John Pitblado. Even though I had started spinning on a borrowed wheel prior to the lessons, it was good to learn what the teacher recommended. I picked up so many new skills. Oh yes, including carding and combing. Combs are scary looking. John dubbed them "Freddy Combs".
This is where a lot of people walked away with empty wallets. Carolina Homespun. I truly enjoyed meeting Morgaine. I loved getting hugs from her. :-) What did I get? Well, not many items. The "Angelina" fiber, some silk for the class, some lubricant for spinning wheel. Oh yeah, I can now be called an owner of a wheel! Yep. Got myself a double-treadle Lendrum and its carrying bag. Couldn't buy anything else after that!
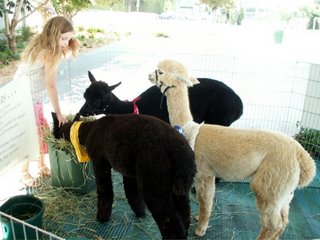
Alpacas! I was surprised to see them there. I didn't think they could arrange for farm animals to be at the location. They weren't there when I arrived early for the class.
Sunday GLASG spin-in. From 9:30 am to 2 pm. Hours of fun. I was too lazy to take the wheel so I took my spindles. We sat outside next to the entrance and that attracted a lot of people. They stopped to see the spinning action and asked questions. We might have gotten a few new members out of this. :-)
Last weekend was the "Fabulous Fiber Fest" show. I spent 6 hours on Friday in the "Spinning Wheel A-Z" class, taught by the very wonderful and very thorough John Pitblado. Even though I had started spinning on a borrowed wheel prior to the lessons, it was good to learn what the teacher recommended. I picked up so many new skills. Oh yes, including carding and combing. Combs are scary looking. John dubbed them "Freddy Combs".
The yarn I made in class. Other than setting the twist, it was completely done in class. John provided the fiber. I think it was Colonial.
I got this from Carolina Homespun. Click on the photo for a larger view. Know what it is? Sparkles! Sparkly "Angelina" fiber. I had to get it. I've been wanting some for a while. This one is "Crystal Amethyst" with blue/purple flashes when the light hits the fiber. Beautiful. I am hoping to get some "Silver Hologram" in the future. That one looks like it has tiny LED lights embbeded in it. WOW!
I wonder if I can blend this with some roving using hand cards? Can roving be worked again with hand cards?
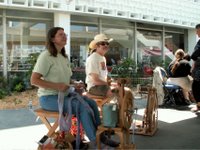
This is Dave, a member of GLASG, demonstrating wheel spinning and greeting people. I really enjoyed chatting with him, watching him spin, and checking out his goodies during breaks.
This little girl and her mom were also giving demonstration on spinning, plus crocheting. Isn't that an interesting wheel? AND, look over to the left. See the sparkles in the fiber on the table? Yep! Angelina! Oh, I want some more of that!
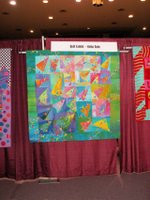
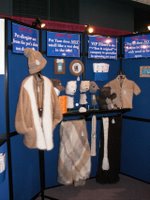
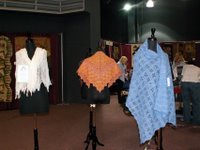
Here are some of the show pieces. They were hung throughout the space:
This is where a lot of people walked away with empty wallets. Carolina Homespun. I truly enjoyed meeting Morgaine. I loved getting hugs from her. :-) What did I get? Well, not many items. The "Angelina" fiber, some silk for the class, some lubricant for spinning wheel. Oh yeah, I can now be called an owner of a wheel! Yep. Got myself a double-treadle Lendrum and its carrying bag. Couldn't buy anything else after that!
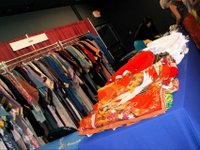
This is the Azabu-ya booth. Tons and tons of fabric. Lots of beautiful Japanese fabric.
More photos of the vendors at the show:
Alpacas! I was surprised to see them there. I didn't think they could arrange for farm animals to be at the location. They weren't there when I arrived early for the class.
Sunday GLASG spin-in. From 9:30 am to 2 pm. Hours of fun. I was too lazy to take the wheel so I took my spindles. We sat outside next to the entrance and that attracted a lot of people. They stopped to see the spinning action and asked questions. We might have gotten a few new members out of this. :-)
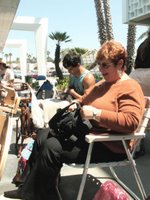
Lisa and Randall. Lisa has a business and travels around to be in shows. Sorry, I can't remember the name of it. Randall is our guild president.
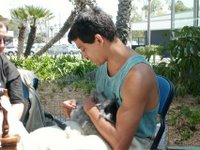
This is Chris. He brought along a few of his English Angora rabbits. Here you can see Chris plucking fur from a rabbit. No, it didn't hurt. I think they rather liked it. :-)
This is Helene, a wonderful lady. I believe we will be carpooling quite often in the future. Her home is only minutes away from me. Oh yeah, you can see that Chris was still plucking away.
Thursday, August 17, 2006
Quick Update
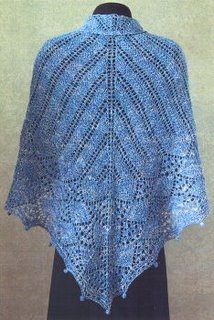
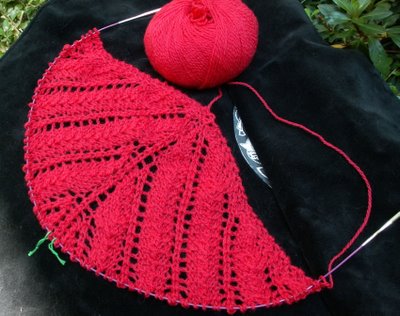
This is what I have after knitting 45 rows of Lotus Blossom. Everyday it is difficult to decide if I want to knit the shawl or spin. Both are equally pleasurable.
Lotus Blossom is not difficult at this point. Maybe Violets taught me a lot. I am not using a life line. Not yet. I think I am able to fix the mistakes with this pattern. I had to a few times already. Also, once you see how the design works, it is easy to spot mistakes. Size 8 needles and fingering weight yarn make it less intimidating too.
Anyhoo, that's the update. More later!
Oh, did you check out Ted's latest yarn creation? OMG!
Friday, August 11, 2006
Catching Up
Last night's Stitch N' Pitch was a lot of fun! 560 of fiber loving people and their family and friends showed up. Each person got a free tote that's stuffed with gifts. Most contained two balls of yarn and a pair of needles. Good stuff. I didn't take a camera with me. So if you want to see some photos, you can visit Faith and Ellen.
Update, 8.14.2006, more S&P photos on A Mano's Blog. Don't forget to look in their sidebar for more.
I took with me a spindle, some fiber, a ball of Manos del Uruguay and US 11 needles, so I could choose to spin or knit. One look at the gigantic stadium I chickened out on spinning. We were sitting at the first row on the second tier. Right there on the edge where it was possible to drop stuff and have it fall all the way down to the first tier. I did not want to risk loosing my lovely spindle. No way! So I chose knitting. I had a printed copy of "My So Called Scarf" pattern.
I wanted to do this scarf long time ago but had forgotten all about it. Thank you, Dave, for reminding me. I had to knit this right away so I won't forget it again. With that decision made, I went to A Mano and picked up two balls of Manos, color 110. Speaking of the Manos, it involved a little bit of mystery. Gerald put me on a little treasure hunt. Long story short, he got me a gift certificate at A Mano, but pretended to be only a messenger. I did think that he was behind all this. But for him to be the person to tell me threw me off. LOL Good going, Jerry! I am sure that I also made him anxious. Being a low-key person, I waited a few days for someone to call me about this surprise. Alas, no one did. I then questioned Gerald about it many times. I am sure he just wanted to kick me then. :-) But he was good at keeping it to himself. LOL Anyway, I put that generous gift to good use as soon as I got it...
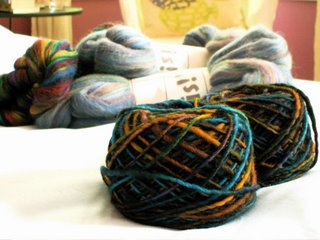
Three bundles of spinning fiber. About 4 oz each. Lovely colors and wonderful to add to a new spinner's stash! And, of course, the Manos. Oh, I love color 110! They knit up so nicely...
I know, not much done on the scarf. There was a lot of chatting, you know. Also, "My So Called Scarf" is not recommended for baseball games. At least not for me. It is quite easy, but it involves couple of tricks in the pattern. Some attention is required. :-)
Thank you for the very generous gift, Jerry! :-)
Update, 8.14.2006, more S&P photos on A Mano's Blog. Don't forget to look in their sidebar for more.
I took with me a spindle, some fiber, a ball of Manos del Uruguay and US 11 needles, so I could choose to spin or knit. One look at the gigantic stadium I chickened out on spinning. We were sitting at the first row on the second tier. Right there on the edge where it was possible to drop stuff and have it fall all the way down to the first tier. I did not want to risk loosing my lovely spindle. No way! So I chose knitting. I had a printed copy of "My So Called Scarf" pattern.
I wanted to do this scarf long time ago but had forgotten all about it. Thank you, Dave, for reminding me. I had to knit this right away so I won't forget it again. With that decision made, I went to A Mano and picked up two balls of Manos, color 110. Speaking of the Manos, it involved a little bit of mystery. Gerald put me on a little treasure hunt. Long story short, he got me a gift certificate at A Mano, but pretended to be only a messenger. I did think that he was behind all this. But for him to be the person to tell me threw me off. LOL Good going, Jerry! I am sure that I also made him anxious. Being a low-key person, I waited a few days for someone to call me about this surprise. Alas, no one did. I then questioned Gerald about it many times. I am sure he just wanted to kick me then. :-) But he was good at keeping it to himself. LOL Anyway, I put that generous gift to good use as soon as I got it...
Three bundles of spinning fiber. About 4 oz each. Lovely colors and wonderful to add to a new spinner's stash! And, of course, the Manos. Oh, I love color 110! They knit up so nicely...
I know, not much done on the scarf. There was a lot of chatting, you know. Also, "My So Called Scarf" is not recommended for baseball games. At least not for me. It is quite easy, but it involves couple of tricks in the pattern. Some attention is required. :-)
Thank you for the very generous gift, Jerry! :-)
Sunday, August 06, 2006
Loosen Up!
Thanks to Ted's recent post on Looser Cast-on, I now understand how to do it properly!
He breaks down the construction of a cast-on stitch and shows you where you need to pay attention to get a looser cast-on. Complete with photo illustrations. I'd like to join the others who have said this before... Ted should write another book! He has a wonderful way of explaining things.
Thursday, August 03, 2006
Blossom Swatch
This is a test. Only a test.
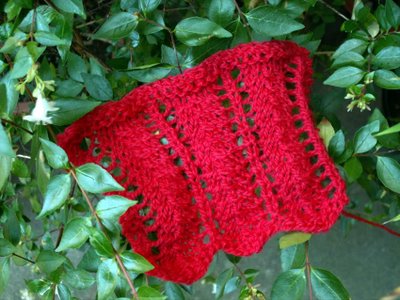
I have finally started doing something with the Lotus Blossom Shawl. I knitted the gauge swatch on Tuesday. The yarn is KnitPicks' Palette, color Red. US size 8 needle. I wouldn't have chosen this bright red if not for my mom's love for such colorful clothing. Bright red is very lucky for Chinese people. And I think that she wears it well too.
The size maybe a tiny bit smaller. But I really like how it looks unblocked. (Yes, I still have to block it to make a final decision.) My mom is a smaller woman. I think this might just work out great. The gauge swatch uses the "stem" pattern of Lotus. Looks OK I think. Gives me a little more confidence to tackle the whole thing. :-) I do think that the cast-on looks a little tight. The instruction calls for a "very loose" cast-on. I used a size 10.5 and this is what I get. How do you determine these things?
Subscribe to:
Posts (Atom)