Following the original instructions, when knitting the violets you increase 2 stitches on the purl rows (even number rows). This will create an unbalanced look (in my opinion). To solve the problem, do a YO at the beginning of each row instead (except the last row of the pattern.) This will give you 2 increases every 2 rows, just like the original pattern.
The cast-on and the first 2 rows are also modified to incorporate the YOs. Cast on 3 stitches using long-tail cast-on. Do not tighten the strand coming off the thumb too much. Keep it loose. (Check out Ted's post on loose cast-on.) Then follow these steps:
Row 1: YO, k 3. (4 stitches on needle)
Row 2: YO, p 4. (5 stitches on needle)
Row 3: YO, k 2, O, SSK, k1. (6 stitches on needle. This is actually the same as what's charted for Row 3 in the pattern, except that there's YO at the beginning.)
Row 4: YO, p to end.
Row 5: YO, k1, k2tog, O, k1, O, SSK, k1.
Row 6: YO, p to end.
So, basically you work the odd number rows as instructed in the pattern except adding a YO in the beginning of the row. The even number rows your work a YO in the beginning then just purl to the end, ignoring the k f&B increases. You might want to hold the YOs in place with your fingers when you work the next stitch so that it won't twist out of place. Do the YOs normally. Meaning yarn in back on the knit rows, yarn in front on the purl rows. Don't do the YO on the last row of the pattern (which is an odd number row), or you will have one extra YO on the right of the triangle.
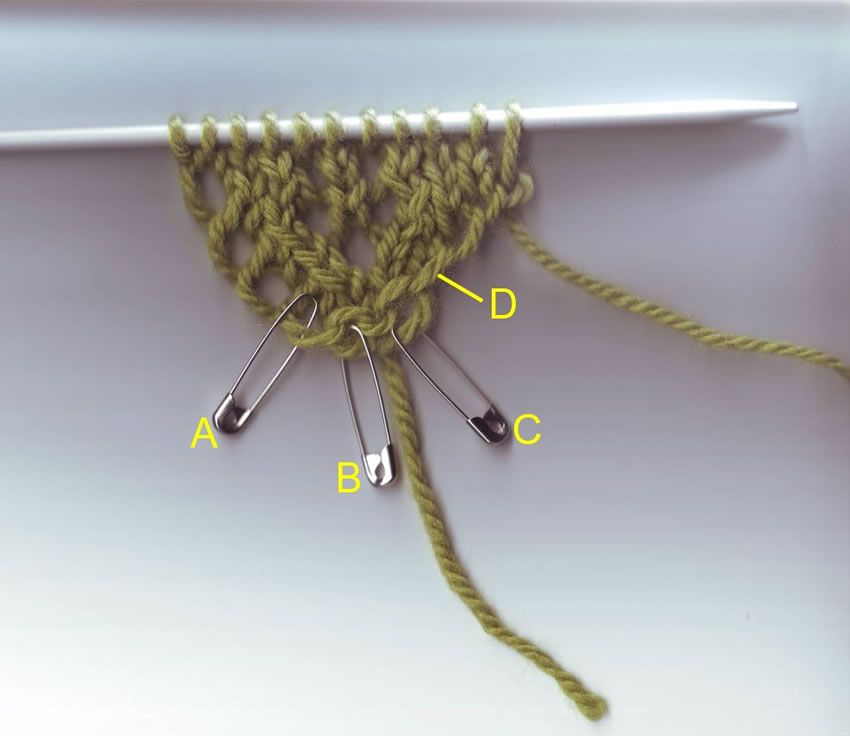 A, B and C in the above picture are the 3 cast-on stitches. A being the first one. Put markers on these and it will be much easier to pick up and knit later. D is the first YO on row 1.
Now, after you finish knitting the violets, you will begin knitting up along left and right sides of the triangle for the River, starting on the left. Put a spare needle through the YOs on the left like this:
 Once you are ready, pick-up and knit like this: (knit, purl into 1 YO; knit, purl into next YO; knit into 3rd YO); repeat this along the edge. There should be 121 stitches when you reach the cast-on stitch marked A . Work "k1, O k1" into the stitch marked B. Beginning with the cast-on stitch marked C you pick-up and knit like before. If for some reason that you find you have too many stitches picked up, skip some the purl stitches in the process.
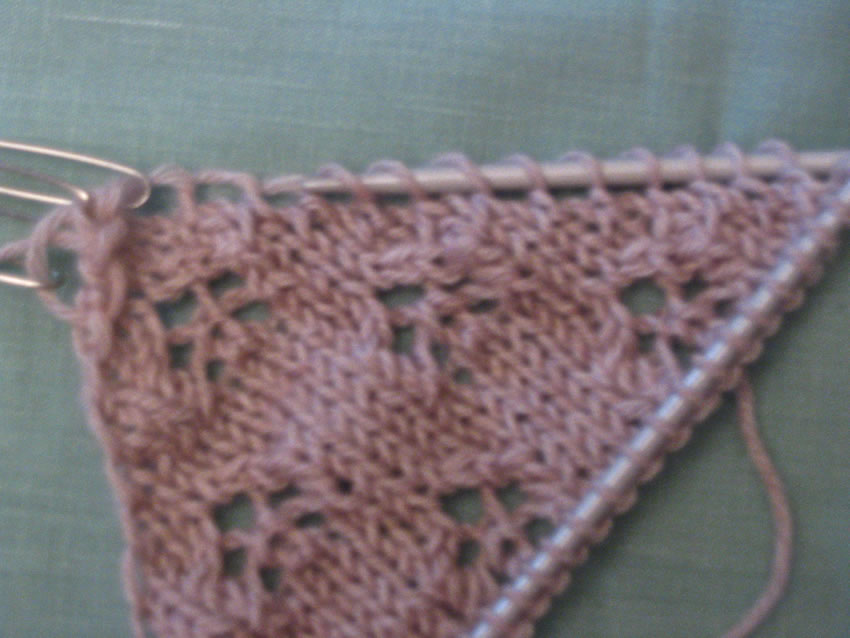
Now, there's one more thing. Ted turned me on to adding one extra stitch on each side so that the violets are not so near the edges. If you compare the two samples above, you will notice that the pink violets are not as close to the edge as the green one. If you like that, you will have to add a couple of rows before you start the pattern. Meaning, you will start knitting the violets at row 5 instead of row 3. This is what you do:
Cast on 3 stitches.
Row 1: YO, k 3. (4 stitches on needle)
Row 2: YO, p 4. (5 stitches on needle)
Row 3: YO, k 5. (6 stitches on needle)
Row 4: YO, p 6. (7 stitches on needle)
Row 5: YO, k3, O, SSK, k2.
Row 6: YO, p to end.
As stated, the pattern begins on row 5. Follow the pattern. Just remember that you are adding one extra stitch at the beginning after the YO, and one at the end.
Now, there will be 2 extra rows when you are ready to pick-up for the River. So, take out a couple of the purl stitches. Also, there will be 2 extra stitches across the top when you are ready for the honeybees. You can ignore the increases on one row to remedy that.
OK, I think that's it. Let me know if there's any questions. I'll try my best to answer them.
Ted, please let me know if you see anything wrong. Oh, Ted, thanks for all the instructions and the sample photos. :-)

8 comments:
Dear Jason,
Thank you for taking so much time to put down the changes to the shawl. Whew! I'll have to reference this again after I obtain the pattern! Thanks again!
man, that's way over my head. I jsut want to know where you got those safety-pins (without the windy thing at the bend!)?
I'm with bro. way out of my league of comprehension, but the pics of your shawls have been beautiful.
Jason: Looks very good. You should host a knitalong. (grin, duck, run)
Micah: Coil-less safety pins come from Schoolhouse Press. http://schoolhousepress.com/tools.htm
Currently 15 pins for $2US. I find them indispensible in knitting.
great modification! Looks like it would make stitches much easier to pick up along the edges, too...
Looks great, I love that shawl...bees..violets..thank you (and Ted).
Yes Ted, run, run real fast. Hmmm... "Freddy Combs" would be handy just about now. Oooo, not a very good thought. hehehe Let me see you host a knit-along first! :-P
Micah & Matt, you really need the pattern to make sense of the modification. :-) Micah, check the LYS for the safety pins too.
To everyone, I hope what I typed is clear. Please let me know if I need to make any correction. Thanks! :-)
I just found schoolhouse this morning! thanx guys!
Post a Comment